There’s something undeniably magical about pearl nails. That soft, milky shimmer, the way they catch the light and glow with an almost otherworldly radiance — it’s no wonder this trend has taken over nail feeds everywhere. Whether you’re prepping for a wedding, a beach getaway, or just want nails that feel quietly luxurious on a Tuesday, pearl nails deliver every single time.
In this guide, we’re breaking down everything you need to know: what pearl nails actually are, how to get them at home or at the salon, the best designs trending right now, and how to make them last. Let’s dive in.
What Are Pearl Nails?
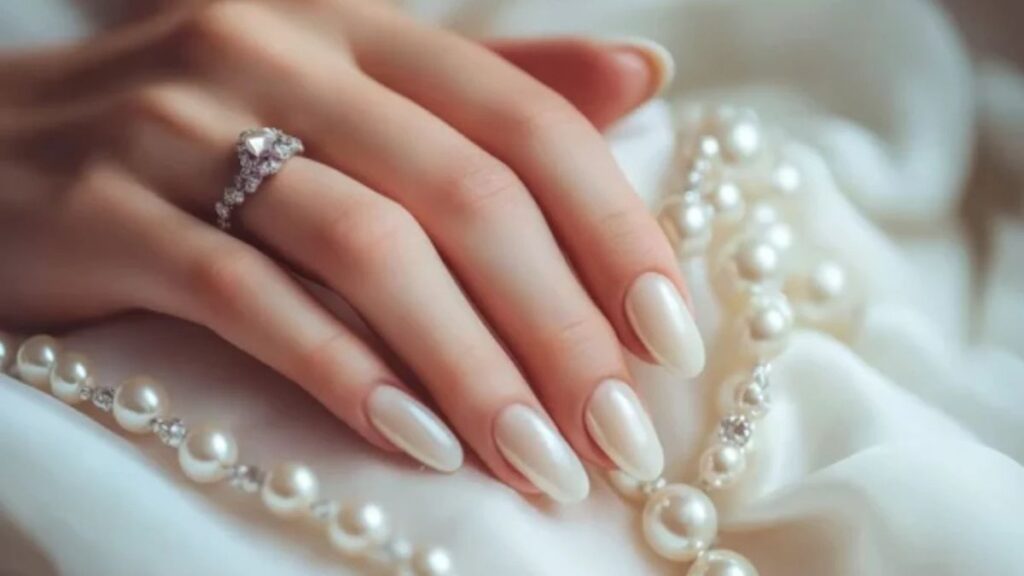
Pearl nails refer to any nail look that mimics the iridescent, luminous quality of a real pearl. Think soft white with shifting tones of pink, lavender, gold, or blue — depending on the light and the angle you’re looking from.
Unlike regular nail polish, the pearl effect relies on special pigments or finishes that create that signature multi-dimensional glow. You’ll often see terms like:
- Pearlescent nails — a shimmery, multi-toned finish
- Opalescent nails — similar to opals, with shifting rainbow undertones
- Chrome pearl nails — a high-shine, mirror-like pearl effect using chrome powder
- Milky nails with pearl shimmer — a softer, more subtle approach using a sheer base with a pearl dusting
The Appeal of Pearl Nails
Part of what makes this trend so enduring is its versatility. Pearl nails can be dressed up for formal events or kept minimal for everyday wear. They complement every skin tone and work on any nail shape — from short squoval nails to long stiletto tips.
They also photograph beautifully, which, let’s be honest, is a bonus nobody ignores.
Pearl Nail Finish Types at a Glance
| Finish Type | Appearance | Best For | Difficulty Level |
|---|---|---|---|
| Milky Pearl | Soft, sheer white with subtle shimmer | Everyday, minimalist looks | Easy |
| Opalescent | Multi-colour shift (pink/blue/purple) | Special occasions, nail art | Moderate |
| Chrome Pearl | Mirror-like, high-gloss shine | Editorial, bold looks | Moderate–Hard |
| Holographic Pearl | Rainbow sparkle with pearl base | Festivals, parties | Moderate |
| Glitter Pearl | Fine pearl glitter suspended in colour | Fun, textured looks | Easy |
How to Do Pearl Nails at Home
Good news — you don’t need a salon to pull off a stunning pearl manicure. With the right products and a little patience, you can get professional-looking results from your own kitchen table.
What You’ll Need
- Nail prep kit (file, buffer, cuticle pusher)
- Base coat
- Pearl or pearlescent nail polish (or a clear base + pearl powder)
- Top coat (gel or regular)
- Nail lamp (if using gel products)
- Optional: chrome powder applicator sponge
Step-by-Step Process
Step 1 — Prep Your Nails Start with clean, dry nails. Remove any old polish, file to your desired shape, and gently push back your cuticles. Buff the surface lightly to help the polish grip better.
Step 2 — Apply a Base Coat Never skip this step. A good base coat protects your nails and makes the colour last days longer. Let it dry completely.
Step 3 — Apply Your Pearl Polish Apply thin, even coats. Two coats are usually enough for full opacity — but if you’re going for a sheer, milky look, one light coat works beautifully over a white base.
Step 4 — Add Pearl Powder (Optional) If you want a chrome-style pearl effect, apply a no-wipe top coat first, then use a silicone applicator or your fingertip to gently rub pearl powder across the nail in circular motions. The results are genuinely stunning.
Step 5 — Seal with Top Coat This locks in the shimmer and adds that glass-like shine. For extra durability, apply two layers of top coat.
Pearl Nail Designs for Every Occasion
One of the best things about pearl nails is how adaptable they are. Here are some of the most popular styles and when to wear them.
1. Classic Milky Pearl Nails
A sheer, white-tinted base with a soft pearl shimmer throughout. This is the most wearable version — it goes with everything and suits every nail length. Think of it as the little black dress of nail trends.
2. Pearl Ombre Nails
A gradient that transitions from a soft nude or white at the base to a pearlescent shimmer at the tips. This gives the illusion of longer nails and adds dimension without being overwhelming.
3. Accent Pearl Nail
Keep most nails in a neutral or muted tone and apply a full chrome pearl finish to just the ring finger. It’s a subtle way to add drama without committing to a full statement look.
4. Pearl French Tips
A modern twist on the classic French manicure — instead of a white tip, use a pearl or iridescent chrome shade. It feels elevated and fresh.
5. Encapsulated Pearl Nails
Tiny real pearl beads or shell fragments embedded inside gel nails. This technique requires nail tech, but the 3D effect is absolutely worth it.
Pearl Nail Designs by Occasion
| Occasion | Recommended Design | Finish Type |
|---|---|---|
| Wedding / Bridal | Classic milky pearl or encapsulated pearl | Soft, sheer |
| Office / Everyday | Milky pearl, short oval shape | Subtle shimmer |
| Party / Night Out | Chrome pearl or holographic pearl | High-shine |
| Beach / Summer | Pearl ombre with coral or blush tones | Iridescent |
| Festival / Event | Full chrome + glitter pearl accents | Bold, multi-finish |
| Minimalist Daily | One-coat sheer pearl on natural nails | Barely-there glow |
Choosing the Right Pearl Nail Products
With hundreds of options on the market, knowing what to look for saves you a lot of trial and error.
Best Base Polish Shades for Pearl Effects
- White or milk white — maximises the pearl shimmer and creates a clean canvas
- Nude or beige — gives a more skin-close, subtle finish
- Clear — allows the pearl powder or shimmer to be the star
What to Look for in a Pearl Polish
- Multi-chromatic pigment for that real light-shifting effect
- Good opacity in 1–2 coats
- Fast dry time if you’re using regular polish
- Compatibility with gel systems if you want longer wear
Pros and Cons of Pearl Nails
Before you commit, here’s an honest breakdown of what you’re working with.
Pros
- Universally flattering — the soft tones work beautifully on all skin tones
- Trend-proof — pearl nails have been popular for decades and show no signs of fading
- Versatile — can be casual or formal depending on the finish
- Low maintenance look — minor chips are less noticeable than on block-colour nails
- Grows out gracefully — especially milky and sheer pearl shades
Cons
- Chrome pearl can chip faster — without proper sealing, the powder can wear off
- Requires prep — rushed application can look streaky
- Some products are pricey — quality chrome powders and gel polishes can add up
- Not always long-lasting without gel — regular pearl polish may only last 4–5 days
Common Mistakes to Avoid
Even with the right products, a few missteps can ruin an otherwise beautiful pearl manicure. Watch out for these:
- Skipping the base coat — this leads to staining and poor adhesion
- Applying thick coats — thick layers bubble, streak, and take forever to dry
- Not capping the free edge — forgetting to seal the tip causes chipping from the edge inward
- Using a wipe-off top coat with chrome powder — you need a no-wipe gel top coat before applying the powder, or it won’t stick
- Rushing between coats — impatience causes smudging; let each layer fully dry
- Skipping cuticle prep — ragged cuticles break the illusion of a polished finish
Best Practices for Long-Lasting Pearl Nails
Follow these tips and your pearl manicure will stay gorgeous for up to two weeks (gel) or 5–7 days (regular polish).
- Always use a peel-resistant base coat designed for longevity
- Apply thin layers — two thin coats beat one thick one every time
- Seal the tips on every coat, including base and top coat
- Reapply top coat every 2–3 days if using regular polish
- Wear gloves for cleaning and dishwashing — harsh chemicals dull the pearl finish fast
- Moisturise your cuticles daily — healthy skin around the nail makes any manicure look better
- Avoid peeling or picking — if a nail chips, use a small brush and matching polish to touch up rather than picking it off
Conclusion
Pearl nails sit at the intersection of timeless elegance and modern nail artistry. Whether you go for a simple milky shimmer for everyday wear or a full chrome pearl moment for a special occasion, this is one trend that rewards every effort you put in. The luminous, light-catching finish adds something effortlessly beautiful to your look — and once you try it, plain nails will feel a little ordinary by comparison.
Take your time with prep, invest in a good pearl polish or powder, and don’t skip that top coat. Your nails will thank you.
Frequently Asked Questions
Pearl nails use specially formulated pearlescent or iridescent pigments that create a light-shifting, multi-tonal shimmer effect. Unlike flat nail polish, the finish changes appearance depending on the light and angle, mimicking the surface of a real pearl.
With regular nail polish, a pearl manicure typically lasts 4–7 days with proper prep and a good top coat. Gel-based pearl nails, especially with UV curing, can last 2–3 weeks before needing a fill or removal.
Yes. If you use regular (non-gel) pearlescent nail polish or chrome powder with a fast-dry top coat, no lamp is needed. However, gel pearl nails require a UV or LED lamp to cure properly.
Pearl nails look stunning on any shape, but oval, almond, and round nails tend to show off the iridescent shimmer best because the curved surface reflects more light. Short square or squoval shapes also work beautifully for a clean, modern look.
Absolutely — pearl nails are one of the most popular bridal nail choices. The soft, luminous finish complements white gowns and photography lighting perfectly. Classic milky pearl or encapsulated real pearl designs are especially popular for brides.
/ You May Also Read /
Nail Art Black Design: The Ultimate Guide to Bold, Timeless Nail Looks
Nail Polish Thinner: The Complete Guide to Reviving Old and Thick Polish