There’s something undeniably magnetic about black nail art. It’s bold, versatile, and never really goes out of style. Whether you’re after a minimalist matte finish or an elaborate design loaded with foil and gems, black nails have a way of making a statement without trying too hard. Over the past few years, dark nail aesthetics have exploded across social media — and honestly, it’s easy to see why.
In this guide, you’ll find everything from beginner-friendly dark nail designs to advanced techniques that nail artists swear by. Plus, you’ll get practical tips, common pitfalls to avoid, and a breakdown of the tools that actually make a difference.
What Is Black Nail Art? A Quick Definition
Black nail art refers to any decorative nail design that uses black polish as the primary or dominant color. It can range from a clean solid black manicure to detailed patterns layered on top using contrasting shades, foils, rhinestones, or stamps.
The term covers a wide creative territory:
- Solid black manicures — classic, clean, and endlessly wearable
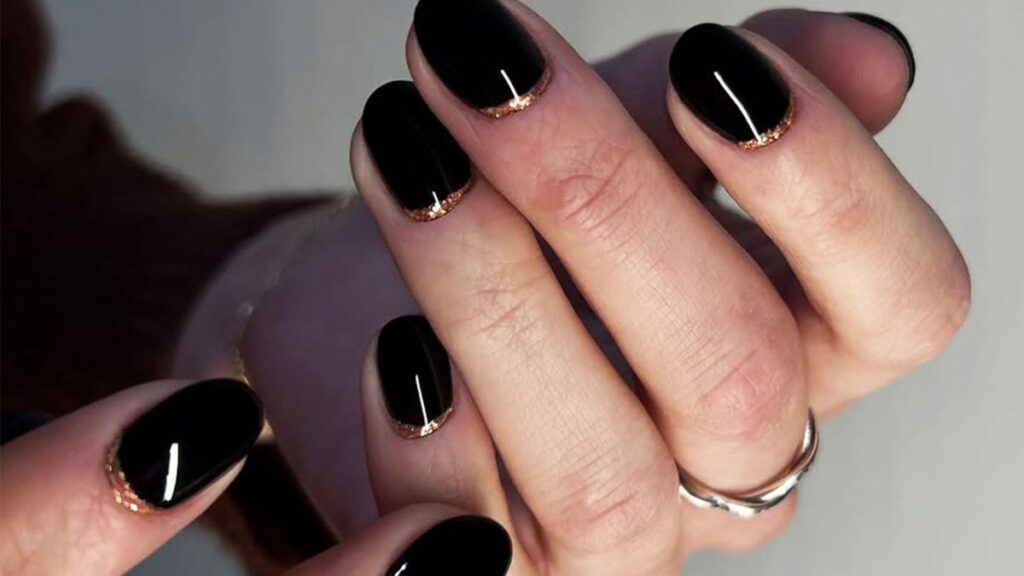
- Black nail designs with accents — gold foil, chrome, glitter, or gems
- Negative space nail art — exposing the natural nail through cutout shapes
- Stamped black nails — intricate patterns pressed onto a dark base
- Black ombré and gradient nails — fading from black into another shade
What makes it so popular? It works across skin tones, nail shapes, seasons, and occasions. Few other colors offer that kind of flexibility.
Types of Black Nail Art Designs to Try
Matte vs. Glossy Black Nails
The finish you choose transforms the entire look of your manicure. Both have their fans, and both serve a purpose.
| Finish Type | Best For | Durability | Aesthetic Vibe |
|---|---|---|---|
| Matte Black | Everyday wear, minimalist looks | Moderate (chips faster) | Edgy, modern, sleek |
| Glossy Black | Formal events, bold statements | Higher with top coat | Classic, dramatic |
| Satin Black | Versatile middle ground | Moderate | Subtle, sophisticated |
| Chrome/Mirror Black | Fashion-forward looks | Lower without gel | High-impact, futuristic |
A matte top coat over a regular black polish is an easy way to experiment without buying extra products. Just make sure to reapply frequently since matte finishes tend to wear down faster at the tips.
Geometric and Negative Space Designs
Geometric black nail art is having a serious moment right now. Think clean lines, triangles, and half-moon cutouts that reveal the natural nail underneath. This style works beautifully on almond and coffin-shaped nails, though it looks just as good on shorter square nails.
Negative space designs are especially popular because they feel modern without being overly complicated. You can create them using thin nail tape, freehand with a liner brush, or even with pre-cut vinyl stencils.
Floral and Botanical Black Nail Art
Black florals sound dramatic, but the result is often surprisingly delicate. Painting tiny white flowers or soft grey blossoms over a black base creates a gothic-romantic effect that suits everything from a day out to a wedding guest look.
Try stamping plates for consistent floral patterns if you’re not confident freehanding. The contrast between a deep black background and fine-line florals is genuinely striking.
Black Glitter and Ombré Nails
For something with more dimension, a black-to-silver or black-to-purple ombré is a crowd favourite. You can achieve the gradient with a small sponge — dab the blended colours directly onto the nail for a seamless fade.
Adding chunky glitter or holographic flakes over a black base creates a night-sky effect that catches light beautifully and works well for parties or festive occasions.
Tools and Products That Actually Make a Difference
Getting clean, professional results at home comes down to having the right supplies. You don’t need a salon-sized kit — just a few quality essentials.
Must-Have Tools for Dark Nail Designs
- Thin liner brush (size 000 or 00): Absolutely essential for any fine detail work
- Dotting tool: Creates perfect circles and dots for patterns
- Stamping kit: Includes a plate with engraved designs and a stamper head
- Nail tape: Creates sharp lines for geometric looks
- Cuticle pusher: Keeps edges clean and professional-looking
Choosing the Right Black Polish
Not all black polishes are created equal. Some are sheer and need three coats to build full opacity. Others go on intensely pigmented from the very first stroke. Here’s a quick comparison to help you choose:
| Polish Type | Opacity | Best Use Case | Avg. Price Range |
|---|---|---|---|
| Regular Black Polish | 1–3 coats | Quick home manicures | $5–$15 |
| Black Gel Polish | Full in 2 coats | Long-lasting (2–3 weeks) | $10–$25 |
| Dip Powder Black | Opaque, full coverage | Durability + strength | $15–$30 (kit) |
| Nail Foil (Black) | Decorative layer | Accents and patterns | $5–$12 |
For home use, a good-quality black gel polish paired with an LED lamp gives you the cleanest, longest-lasting result. Regular polish works fine for shorter wear, but always apply a strengthening base coat first to protect the natural nail.
Pros and Cons of Black Nail Art
Like any manicure trend, black nail art comes with its own set of strengths and trade-offs. Here’s an honest look at both sides:
Pros:
- Works across every season and occasion
- Pairs easily with virtually any outfit colour
- Shows fine details and accents more sharply than lighter shades
- Suits all nail lengths and shapes
- Extremely photogenic — photographs exceptionally well in any lighting
Cons:
- Chips and scratches are more visible than on lighter polish
- Can stain natural nails if applied without a base coat
- Matte finishes require more frequent touch-ups
- Removal can be more intensive, especially with darker gel formulas
- May feel too intense for certain professional dress codes
Common Mistakes to Avoid
Even experienced nail enthusiasts fall into a few predictable traps. Knowing what they are ahead of time saves a lot of frustration.
1. Skipping the base coat. Black pigment stains nails yellow over time — sometimes permanently. A quality base coat is non-negotiable, not optional.
2. Applying thick coats. Thick polish layers take forever to dry and bubble easily. Two or three thin coats always beat one thick one.
3. Rushing the drying time. Black polish shows every dent and smudge from impatient touching. Give each coat at least two full minutes before the next one.
4. Neglecting the top coat. A glossy top coat extends wear significantly and adds a professional finish. Without it, even the best manicure looks dull within days.
5. Forgetting to cap the free edge. Dragging the brush lightly across the tip of the nail seals the edge and dramatically reduces chipping. It’s a small step most people skip.
6. Using old, thickened polish. Old black nail polish is nearly impossible to apply smoothly. Add a drop or two of nail polish thinner — not remover — to restore consistency.
Best Practices for Long-Lasting Black Nails
Getting your dark manicure to last comes down to preparation and process. Follow these steps consistently and you’ll notice a real difference.
Nail Prep Matters More Than You Think
Start by pushing back the cuticles gently and buffing the nail surface lightly. Then clean each nail with a lint-free pad soaked in rubbing alcohol or nail dehydrator. This removes oils that prevent polish from bonding properly.
Application Tips for a Flawless Finish
- Apply polish in three strokes per nail: one down the centre, then one on each side
- Keep the brush slightly damp — not overloaded
- Let each coat dry completely before the next
- Always finish with a fast-dry top coat or gel top coat for gel manicures
Maintenance Between Appointments
Apply a thin layer of top coat every two to three days to refresh shine and seal any tiny edge chips before they spread. Wearing gloves for cleaning and dishwashing protects the manicure from premature breakdown.
Quick Style Guide: Matching Black Nail Designs to Occasions
| Occasion | Recommended Style | Accent Option |
|---|---|---|
| Everyday Casual | Solid matte black | None needed |
| Office/Professional | Glossy black with neutral accent | Subtle gold line |
| Party/Night Out | Glitter ombré or chrome | Rhinestones |
| Wedding Guest | Floral stamping over black base | Pearl details |
| Festival/Concert | Negative space geometric | Coloured foil |
| Holiday Season | Black with red or silver accents | Foil stars |
Conclusion
Black nail art is one of those rare styles that feels equally at home in a casual setting and a dressed-up one. It’s adaptable, expressive, and genuinely fun to experiment with — especially once you move beyond the solid base and start playing with textures, accents, and techniques.
Whether you’re just getting started with nail art or looking to refine your existing skills, the key is patience and good prep. Take care of the basics — base coat, thin layers, sealed edges, top coat — and the creative side becomes a whole lot more enjoyable.
Start with one or two designs from this guide, build your confidence, and before long you’ll have a nail art rotation you’re genuinely proud of.
Frequently Asked Questions
Almost any nail shape works well with black nail art, but coffin, almond, and stiletto shapes tend to show off detailed designs most dramatically. Shorter square or oval nails work beautifully for minimalist and geometric styles.
Always apply one or two coats of a clear base coat before any black polish. This creates a barrier between the pigment and your natural nail plate, preventing long-term discolouration.
With proper prep and application, a black gel manicure usually lasts two to three weeks without significant chipping. Capping the free edge and reapplying a thin top coat every few days extends the wear further.
Absolutely. Start with solid black manicures, then try nail tape for geometric designs and dotting tools for simple patterns. Stamping kits are also beginner-friendly and produce impressive results with minimal skill required.
Soak a cotton pad in pure acetone, place it directly on the nail, and wrap each finger with a small square of foil. Leave for 10–15 minutes, then gently push the softened gel off with a wooden cuticle stick. Avoid scraping or peeling.
/ You May Also Read /
Nail Art Black Design: The Ultimate Guide to Bold, Timeless Nail Looks
Nail Art for Short Nails: Stunning Designs That Actually Work (2026 Guide)