Introduction
A flawless manicure can completely transform your look, and nothing feels more timeless than a French manicure. At the center of achieving that clean, elegant finish is the nail art brush for French tips, a small but powerful tool that gives you control, precision, and salon-level results at home. Whether you are a beginner exploring nail art or someone refining your technique, the right brush can make all the difference in how crisp and symmetrical your French tips look.
Unlike traditional polish brushes, a dedicated nail art brush allows for controlled strokes, smoother curves, and cleaner smile lines. In this guide, we’ll break down everything you need to know—from choosing the right brush to mastering techniques and avoiding common mistakes.
Nail Art Brush for French Tips: Why It Matters for Perfect Manicures
The nail art brush for French tips is designed specifically to help you create clean, curved white edges without smudging or uneven thickness. It offers precision that standard polish brushes simply cannot match.
The key advantage is control. Instead of relying on a wide applicator, you can guide the polish exactly where you want it. This becomes especially important for achieving symmetrical tips on both hands.
How It Differs from a Regular Nail Polish Brush
A standard brush is built for coverage, not precision. A nail art brush, on the other hand, is engineered for detail work.
Key differences include:
- Thin, fine bristles for precision lines
- Better control over pressure and stroke direction
- Ideal for shaping curves and edges
- Works well with gel, acrylic, and regular polish
Nail Brush Comparison for French Tips
| Brush Type | Best Use Case | Precision Level | Skill Required |
|---|---|---|---|
| Flat Brush | Base coat application | Low | Beginner |
| Angled Brush | Soft curved designs | Medium | Beginner-Inter |
| Liner Brush | French tips & fine lines | High | Intermediate |
| Detail Brush | Intricate nail art | Very High | Advanced |
This comparison shows why a liner-style tool is most commonly used for French tips—it delivers clean, defined edges with minimal effort.
Choosing the Right Nail Art Brush for French Tips
Selecting the right brush depends on your skill level, nail shape, and desired finish. Not all brushes perform the same, and choosing wisely can save you a lot of frustration.
Bristle Type and Shape
Brush bristles come in different shapes, each influencing how polish flows onto the nail.
- Synthetic bristles: Best for gel polish and durability
- Kolinsky bristles: Softer, ideal for detailed blending
- Ultra-fine liner brushes: Best for crisp French tips
Best Brush Features by Nail Style
| Nail Style | Recommended Brush Type | Ideal Bristle Length |
|---|---|---|
| Classic French | Liner brush | Short to medium |
| Deep Smile Line | Angled brush | Medium |
| Soft French Fade | Detail brush | Short |
| Bold French Tips | Flat edge brush | Medium to long |
Choosing the right combination ensures smoother application and fewer corrections later.
Step-by-Step Technique Using Nail Art Brush for French Tips
Mastering French tips is easier when you follow a structured approach. A steady hand and the right brush technique can dramatically improve results.
Preparation Steps
Before painting, always prepare your nails properly:
- Clean and shape nails evenly
- Apply a base coat
- Let it dry completely
- Choose high-quality polish for smoother application
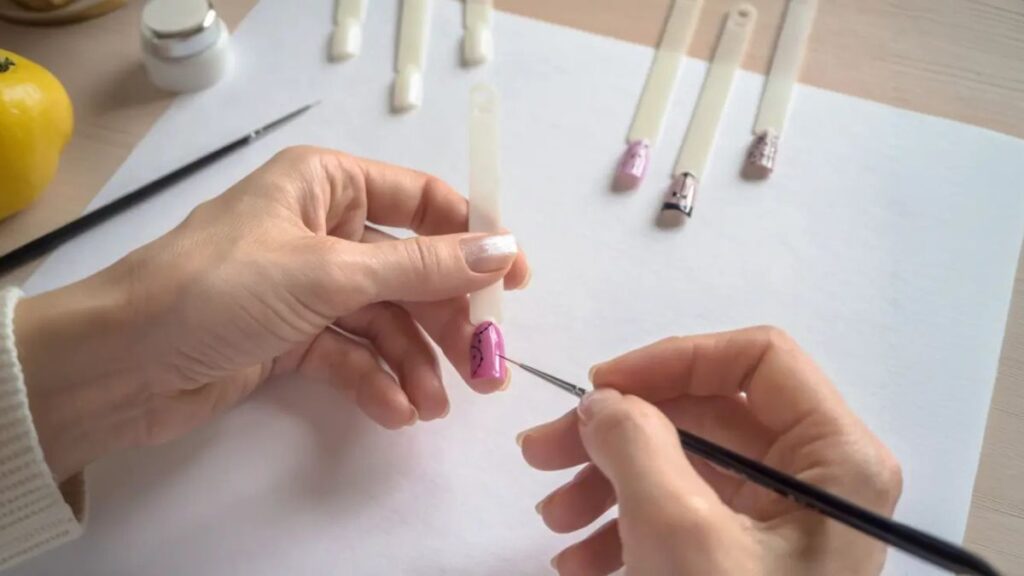
Application Technique
Here’s a simple method to follow:
- Dip the brush lightly into white polish
- Start from one side of the nail edge
- Draw a curved smile line toward the center
- Fill in the tip gently
- Clean edges using a fine brush dipped in remover
Step-by-Step French Tip Workflow
| Step | Action | Tip for Best Result |
|---|---|---|
| 1 | Nail prep | Smooth surface is key |
| 2 | Base coat | Prevents staining |
| 3 | Outline tips | Use light pressure |
| 4 | Fill color | Apply thin layers |
| 5 | Seal with top coat | Adds shine and durability |
Consistency is more important than speed. Slow, controlled strokes produce cleaner results than rushed application.
Common Mistakes When Using Nail Art Brush for French Tips
Even with the right tools, mistakes can happen. Understanding them helps you avoid uneven or messy results.
Some frequent issues include:
- Using too much polish on the brush
- Applying uneven pressure
- Not cleaning brush between strokes
- Skipping base coat
- Rushing the curve design
A clean brush and light hand pressure are essential for sharp French tips.
Pros and Cons of Using a Nail Art Brush for French Tips
Like any beauty tool, it has strengths and limitations.
Pros:
- High precision for clean designs
- Works on all nail types
- Reduces polish waste
- Professional-looking results
Cons:
- Requires practice for beginners
- Needs regular cleaning
- Slight learning curve for symmetry
With consistent use, the pros far outweigh the cons, especially if you enjoy doing nails at home.
Best Practices for Long-Lasting French Tips
To make your manicure last longer and look salon-fresh, follow these tips:
- Always use a quality top coat
- Avoid thick polish layers
- Seal nail edges properly
- Moisturize cuticles regularly
- Store brushes clean and dry
Proper maintenance ensures both your nails and tools stay in top condition.
Conclusion
A well-designed nail art brush for French tips is more than just a tool—it’s the foundation of creating elegant, polished nails at home. With the right technique, proper brush selection, and a bit of patience, anyone can achieve clean, professional-looking French manicures.
Whether you prefer classic white tips or modern variations, mastering this tool opens the door to endless creative possibilities in nail art.
Frequently Asked Questions
A thin liner brush is usually the best choice because it offers maximum precision for curved edges.
Yes, beginners can use it, but it may take a few practice attempts to get smooth lines.
Use nail polish remover for regular polish or gel cleanser for gel-based products.
Gel polish is often preferred for its smooth application and long-lasting finish.
Focus on symmetry, use thin layers, and always finish with a glossy top coat.
/ You May Also Read /
Jelly Nail Polish: The Complete Guide to Glass-Like Nails Everyone’s Obsessing Over
Nail Art Black Design: The Ultimate Guide to Bold, Timeless Nail Looks