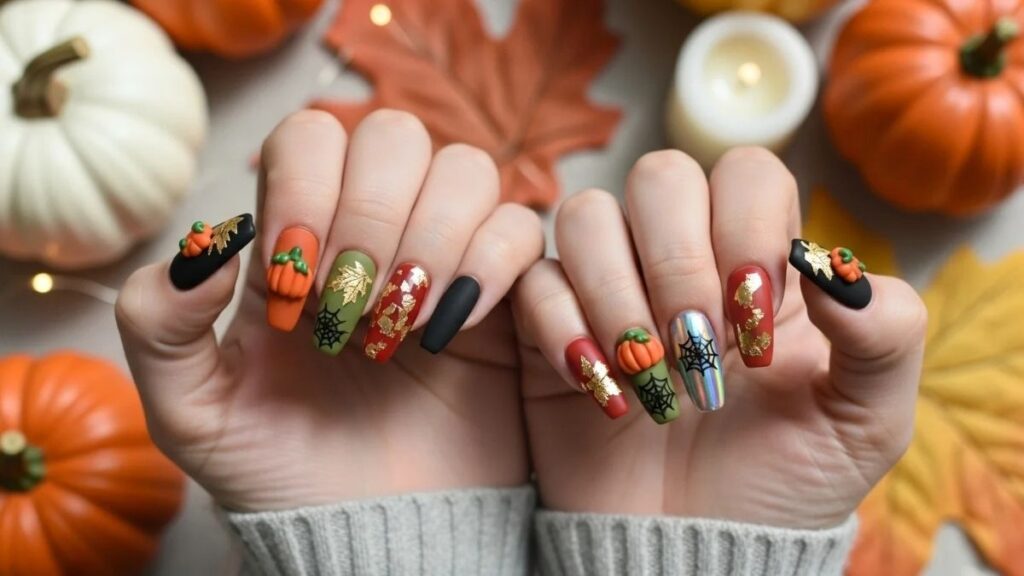
Scarecrow nails have become one of the most requested nail art designs every autumn, and it’s easy to see why. This whimsical, cozy trend combines rustic charm with playful detail, making it perfect for Halloween parties, fall festivals, or just embracing the season in style. Whether you’re a nail tech looking for fresh inspiration or someone who wants to DIY their next manicure, this guide walks you through everything you need to know.
Nail art trends come and go, but scarecrow-inspired designs have real staying power. They’re versatile, easy to customize, and they photograph beautifully for social media. Let’s dig into what makes this look so popular and how you can nail it (pun intended).
What Are Scarecrow Nails?
Scarecrow nails are a fall-themed nail art style inspired by the classic harvest scarecrow. Typically, the design features:
- Warm, earthy color palettes like burnt orange, mustard, brown, and cream
- Hand-painted stitched smiles or button-like details
- Straw or hay textures using fine brush strokes
- Plaid or gingham patterns reminiscent of flannel shirts
- Small accent details like pumpkins, leaves, or crows
This style sits comfortably between cute and spooky, which is exactly why it works so well for both Halloween and general autumn aesthetics.
Why This Trend Is Growing in Popularity
Social media has played a huge role in pushing seasonal nail art into the mainstream. People want manicures that feel intentional and tell a story, not just a plain solid color. Scarecrow nails do that effortlessly. They evoke nostalgia, comfort, and a sense of harvest-time coziness that resonates with a lot of people once September rolls around.
How to Achieve Scarecrow Nails at Home
You don’t need to be a professional nail artist to try this look. With a bit of patience and the right tools, you can recreate scarecrow nails yourself.
Tools You’ll Need
- A base coat and top coat
- Nail polish in orange, brown, mustard, and cream shades
- A thin detail brush or dotting tool
- Nail art tape (optional, for plaid patterns)
- A matte or glossy finish topcoat, depending on preference
Step-by-Step Process
- Start with clean, dry nails and apply a base coat.
- Paint your base color, usually a cream or light tan shade.
- Once dry, use a thin brush to add straw-like streaks in brown and mustard tones.
- Add a stitched smile using small “X” marks in black or dark brown.
- Finish with a topcoat to seal and add shine or a matte effect.
This process typically takes 30 to 45 minutes for a full set, depending on your skill level and how detailed you want the design to be.
Popular Scarecrow Nail Design Variations
Not every scarecrow manicure looks the same. Nail artists have taken this base concept and expanded it into several creative directions.
| Design Variation | Key Features | Best For |
|---|---|---|
| Classic Scarecrow Face | Stitched smile, button eyes, straw texture | Halloween parties |
| Plaid Scarecrow | Gingham or flannel pattern with earthy tones | Everyday fall wear |
| Minimalist Straw Accent | Single accent nail with subtle straw lines | Office-friendly looks |
| Pumpkin Patch Scarecrow | Combines scarecrow face with tiny pumpkins | Themed events |
| Glam Harvest Scarecrow | Adds gold foil or glitter accents | Evening or party wear |
Choosing the right variation depends on where you’ll be wearing your nails and how bold you want the design to be.
Pros and Cons of Scarecrow Nails
Like any nail art trend, scarecrow nails come with their own set of advantages and drawbacks.
Pros
- Highly customizable to suit personal style
- Works well for both subtle and bold looks
- Great conversation starter during fall gatherings
- Photographs beautifully for social media content
- Can be adapted for any nail length or shape
Cons
- Time-consuming for beginners to paint by hand
- Detailed designs may chip faster without proper sealing
- Requires steady hands or practice for the stitched smile detail
- Not ideal for workplaces with strict grooming policies
Common Mistakes to Avoid
Even experienced nail enthusiasts can run into trouble when trying scarecrow nails for the first time. Here are the most frequent missteps.
| Mistake | Why It Happens | How to Fix It |
|---|---|---|
| Overcrowding the design | Trying to fit too many elements on one nail | Stick to one or two focal details per nail |
| Skipping the base coat | Rushing through prep steps | Always apply base coat to protect nails and improve polish adhesion |
| Using thick brush strokes for straw texture | Using the wrong brush size | Use a fine detail brush for thin, realistic lines |
| Not sealing with topcoat | Forgetting the final step | Always finish with a quality topcoat to prevent chipping |
| Choosing mismatched colors | Not planning the palette in advance | Stick to a cohesive autumn color scheme before starting |
Avoiding these mistakes will save you time and help your manicure last longer.
Best Practices for Long-Lasting Scarecrow Nails
If you want your scarecrow nail art to last through the entire fall season, keep these tips in mind.
- Always start with clean, oil-free nails
- Use thin layers of polish rather than thick coats
- Let each layer dry fully before adding the next
- Apply a strong topcoat, and reapply every few days for shine
- Avoid excessive contact with water or harsh chemicals right after application
- Moisturize cuticles regularly to keep the surrounding skin healthy
Following these best practices ensures your design stays crisp and vibrant for two to three weeks, which is typical for gel or hybrid nail polish systems.
Practical Examples of Scarecrow Nail Inspiration
Here are a few real-world scenarios where scarecrow nails shine:
- A pumpkin patch photoshoot with matching plaid scarecrow nails and a cozy sweater
- A Halloween office party where minimalist straw-accent nails keep things professional yet festive
- A fall wedding where the bride opts for a glam harvest scarecrow design with subtle gold detailing
- A social media content creator showcasing a full nail art tutorial using classic scarecrow face designs
These examples show just how flexible this trend can be across different settings and occasions.
Conclusion
Scarecrow nails bring a fun, nostalgic touch to autumn beauty routines. Whether you prefer a bold Halloween-ready design or a subtle nod to the season, this trend offers something for everyone. With the right tools, a little patience, and the tips shared in this guide, you can create a manicure that feels both festive and personal.
As fall approaches each year, expect scarecrow nails to remain a staple in seasonal beauty content, thanks to their versatility and charm. So grab your polish, get creative, and enjoy embracing this cozy harvest-inspired trend.
Frequently Asked Questions
1. What colors work best for scarecrow nails?
Warm autumn tones like burnt orange, mustard yellow, brown, and cream work best for an authentic scarecrow look.
2. How long do scarecrow nails typically last?
With proper sealing and care, scarecrow nail designs can last two to three weeks, similar to standard gel manicures.
3. Can I do scarecrow nails without nail art experience?
Yes, simple designs like minimalist straw accents are beginner-friendly and require minimal detail work.
4. Are scarecrow nails only for Halloween?
No, many variations work well throughout the entire fall season, not just for Halloween specifically.
5. What tools do I need for scarecrow nail art?
You’ll need a base coat, autumn-toned polishes, a fine detail brush, and a topcoat for sealing the design.
/ You May Also Read /
Mummy Nails: The Ultimate Guide to This Spooky-Chic Nail Trend