If you’ve ever stared at a half-chipped gel manicure and wondered whether you could just paint over it with regular nail polish on gel nails, you’re not alone. It’s one of the most common questions in the nail care world — and the good news is, yes, you absolutely can. But there’s a right way and a wrong way to do it.
Whether you want to refresh a fading gel color, try a new shade without a full salon visit, or simply extend your manicure’s life a little longer, this guide covers everything you need to know. From prep to removal, we’ve got you.
Why Would You Apply Nail Polish on Gel Nails?
There are actually quite a few good reasons to reach for a bottle of regular polish when you already have gel nails.
- Color refresh: Your gel manicure has faded or looks dull, and you want to revive it without removing everything.
- Chips and touch-ups: A small chip in the gel surface can be hidden quickly with a layer of matching polish.
- Testing a new color: Not ready to commit to a full gel application of that bold burgundy? Try it over your existing gel first.
- Cost saving: Salon visits add up. Painting over gel at home stretches your manicure further.
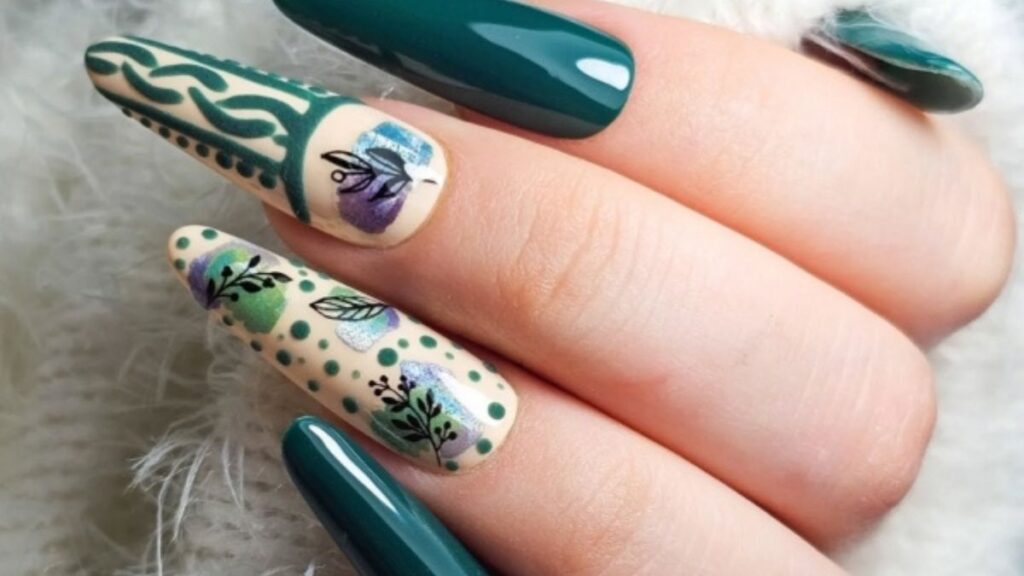
- Creative layering: Nail art lovers use regular polish over gel all the time for intricate designs and finishes.
Whatever your reason, the technique is pretty straightforward — as long as you prep correctly.
Does Regular Nail Polish Adhere to Gel Nails?
Here’s the short answer: yes, regular nail polish adheres to cured gel nails just fine. The cured gel surface is smooth and non-porous enough to hold polish. However, there are a few important caveats.
First, the gel needs to be fully cured. If the gel beneath is soft, tacky, or sticky (some gels leave a sticky inhibition layer after curing), your polish won’t sit properly. Second, the nail surface should be clean and free of oils before you start painting.
The adhesion won’t be as long-lasting as gel-on-gel, but for everyday wear and short-term color refreshes, it works beautifully.
What Type of Nail Polish Works Best?
Not all polishes are created equal when layering over gel. Here’s a quick breakdown:
| Polish Type | Performance Over Gel | Best For |
|---|---|---|
| Regular nail polish | Good — dries fast, easy removal | Touch-ups, color testing, short-term wear |
| Gel polish (with UV lamp) | Excellent — long-lasting | Full refresh without removing base gel |
| Nail polish strips | Moderate — can lift at edges | Quick nail art, short-term use |
| Matte topcoat | Great — changes finish only | Switching gel gloss to matte look |
| Glitter polish | Good — adds texture | Nail art, covering minor chips |
How to Apply Nail Polish on Gel Nails: Step-by-Step
Getting a smooth, even result takes a little prep work. Don’t skip these steps — they make a real difference.
Step 1: Clean Your Nails Thoroughly
Start by washing your hands and then wiping each nail with a lint-free pad soaked in rubbing alcohol or nail cleanser. This removes any oils, lotion residue, or dust that could prevent the polish from sticking.
Step 2: Lightly Buff the Surface (Optional)
If your gel feels very glossy or slick, you can use a fine-grit buffer (180–220 grit) to lightly scuff the top layer. This gives the polish a bit more to grip onto. Don’t overdo it — you’re just breaking the shine, not filing down the gel.
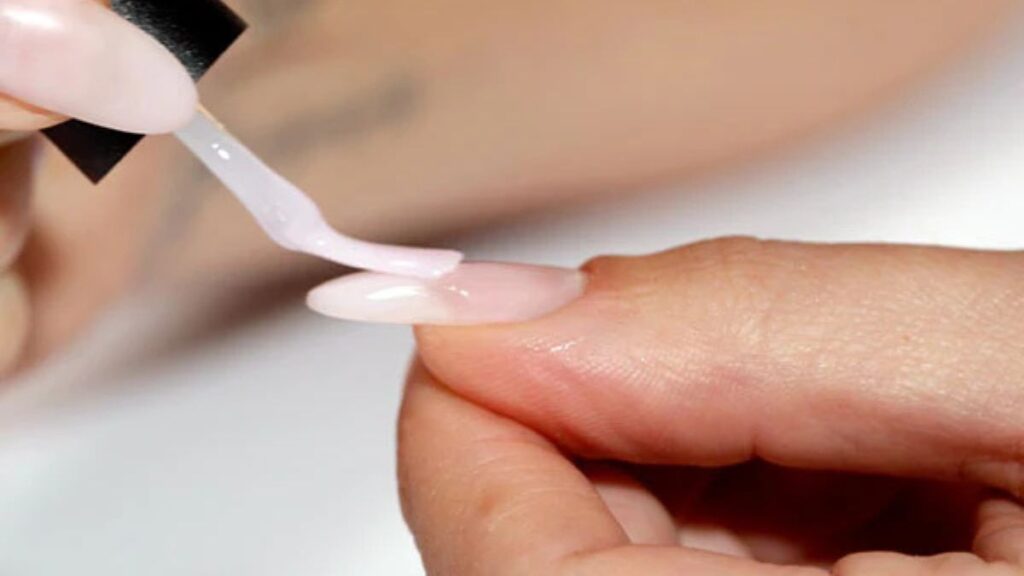
Step 3: Apply a Base Coat (Optional but Recommended)
A thin layer of regular base coat can improve adhesion and protect the gel underneath. Let it dry completely before moving on.
Step 4: Apply Your Nail Polish
Apply your polish in thin, even strokes. Two thin coats are always better than one thick coat. Let each layer dry fully before adding the next.
Step 5: Seal with a Top Coat
This is crucial. A good top coat protects your polish, adds shine, and helps prevent chipping. Look for a fast-drying formula if you’re short on time.
How to Remove Nail Polish from Gel Nails Without Damage
This is where a lot of people go wrong. The goal is to remove the polish layer without disturbing the gel underneath.
Use a non-acetone nail polish remover. Acetone can break down gel formulas — especially softer gels — so reach for an acetone-free remover when possible. If you only have acetone remover, work quickly and avoid soaking.
Here’s what to avoid:
- Prolonged soaking in acetone
- Scraping aggressively with metal tools
- Peeling the polish off (it can take gel with it)
A gentle swiping motion with a soaked cotton pad is all you need. Once the polish is gone, your gel should still be intact and ready for another round.
Pros and Cons of Putting Nail Polish on Gel Nails
Before you grab that polish bottle, it’s worth knowing what you’re signing up for.
| Factor | Pros | Cons |
|---|---|---|
| Cost | Saves money on salon visits | Cheaper polishes may chip faster |
| Convenience | Easy DIY at home | Requires careful removal to protect gel |
| Variety | Access to thousands of regular polish shades | Won’t last as long as gel-on-gel |
| Nail health | Avoids full gel removal (less damage) | Risk of gel breakdown with acetone remover |
| Aesthetics | Fresh color without full redo | Finish may not look as flawless as new gel |
Common Mistakes to Avoid
Even experienced nail enthusiasts make these errors. Keep this list handy.
1. Painting over a sticky or uncured gel layer. If your gel has a tacky inhibition layer and you haven’t wiped it off first, your polish will never set properly. Always wipe with a gel cleanser or isopropyl alcohol after curing.
2. Skipping the surface prep. Oily nails are the enemy of adhesion. Even if your hands feel clean, always wipe with alcohol before painting.
3. Using acetone-based remover carelessly. A few seconds of contact is usually fine, but don’t soak a cotton ball and let it sit on the nail. It will soften and potentially lift the gel.
4. Applying thick coats. Thick layers take forever to dry and are more prone to bubbling and smudging. Thin coats every time.
5. Forgetting a top coat. Without a sealing top coat, regular polish over gel chips within a day or two. It’s not optional.
6. Waiting too long when the gel is already lifting. If the gel itself is lifting at the edges, adding polish on top won’t fix the problem — it’ll just trap moisture and make things worse. Remove and redo when lifting occurs.
Best Practices for Long-Lasting Results
Follow these tips to get the most mileage out of your nail polish on gel nails combination.
- Prep thoroughly every time. Clean, alcohol-wiped nails are the foundation of everything.
- Use quality polish. Budget polishes can work fine, but salon-quality brands tend to have better pigment and staying power.
- Cap the free edge. When applying each coat, swipe across the tip of the nail to seal the edge. This prevents peeling and chipping at the tips.
- Reapply top coat every 2–3 days. A fresh top coat layer can dramatically extend wear time.
- Avoid prolonged water exposure. Wear gloves when washing dishes. Water weakens the bond between layers.
- Moisturize your cuticles, not your nails. Keep cuticle oil away from the nail surface before applying polish.
Recommended Polish Types for Gel Nail Layering
| Goal | Best Product Choice | Why It Works |
|---|---|---|
| Maximum durability | Gel-effect or hybrid polish | Stronger formula, more flexible |
| Quick refresh | Fast-dry nail polish | Minimal prep, dries in minutes |
| Nail art | Stamping polish or art polish | High pigment, precise application |
| Finish change | Matte or chrome topcoat | Changes look without full repaint |
| Budget-friendly | Sally Hansen, Essie, OPI | Widely available, good adherence |
Conclusion
So — can you put nail polish on gel nails? Absolutely. With the right prep and a bit of care during removal, it’s a smart, budget-friendly way to refresh your look, touch up chips, or experiment with new shades between full manicures. The key is treating the gel as a base rather than just painting blindly over it.
Prep well, use thin coats, seal with a top coat, and remove gently with a non-acetone formula. Do those four things, and you’ll be amazed at how great the result looks and how long it lasts.
Your nails are worth the extra five minutes of prep. Trust us.
Frequently Asked Questions
Yes, you can. Regular nail polish sits on top of cured gel without damaging it, as long as you use a non-acetone remover when it’s time to take it off.
With proper prep and a quality top coat, regular nail polish on gel nails typically lasts 3–5 days. Reapplying top coat every couple of days can extend this further.
It’s not strictly required, but a thin base coat improves adhesion and protects the gel layer below. It’s a good habit, especially if you plan to wear the polish for more than a few days.
Acetone can soften or partially break down some gel formulas, especially with prolonged exposure. Use a non-acetone remover where possible, or apply acetone quickly and avoid soaking.
Yes — applying a new layer of gel polish over an existing cured gel base is actually a common salon technique. You’ll need a UV or LED lamp to cure it properly, and the result tends to last longer than regular polish.
/ You May Also Read /
Black Nail Art: 35+ Stunning Ideas, Techniques & Tips for Every Occasion
White Pink Nail Art: The Ultimate Guide to Soft, Stunning Designs