There’s something undeniably timeless about white pink nail art. Whether you’re prepping for a wedding, a summer brunch, or just want your nails looking effortlessly polished, this colour combination never goes out of style. Soft, feminine, and versatile — pink and white nails work on every skin tone, nail length, and occasion.
In this guide, you’ll discover the most flattering designs, the tools you actually need, and a step-by-step breakdown to recreate these looks at home. Plus, we’ll cover common mistakes that can ruin your manicure — and exactly how to avoid them.
Why White Pink Nail Art Is Always in Style
Trends come and go, but the pink and white palette keeps making its way back onto everyone’s fingertips — and for good reason. These two colours complement each other beautifully. White adds crispness and brightness; pink softens and warms. Together, they strike a balance between bold and subtle.
More practically, this combination suits almost every outfit and skin tone. From cool porcelain complexions to deeper, warmer undertones, there’s a shade of pink that works. And white is, by definition, universal.
Another reason this style endures? It photographs well. In an age where nails appear in countless flat lays, selfies, and wedding photos, white pink nail art delivers that clean, editorial look that doesn’t require any filter.
Most Popular White Pink Nail Art Designs
Before you reach for a brush, it helps to know what options are out there. Here’s a breakdown of the most sought-after styles, from beginner-friendly to more advanced techniques.
Classic French Tips with a Twist
The French manicure is the original pink and white nail art — a sheer pink base with a crisp white tip. But modern versions have gotten more creative. Think micro-French tips (incredibly thin white lines), coloured tip variations using dusty rose instead of bright white, and reversed French styles where the tip is pink and the base is white.
Ombre and Gradient Nails
Ombre is one of the most flattering techniques in nail art. The gradient from soft blush pink to pure white creates a dreamy, watercolour effect. You can achieve this using a sponge, a fan brush, or even specific ombre nail gels. The key is blending while the polish is still wet.
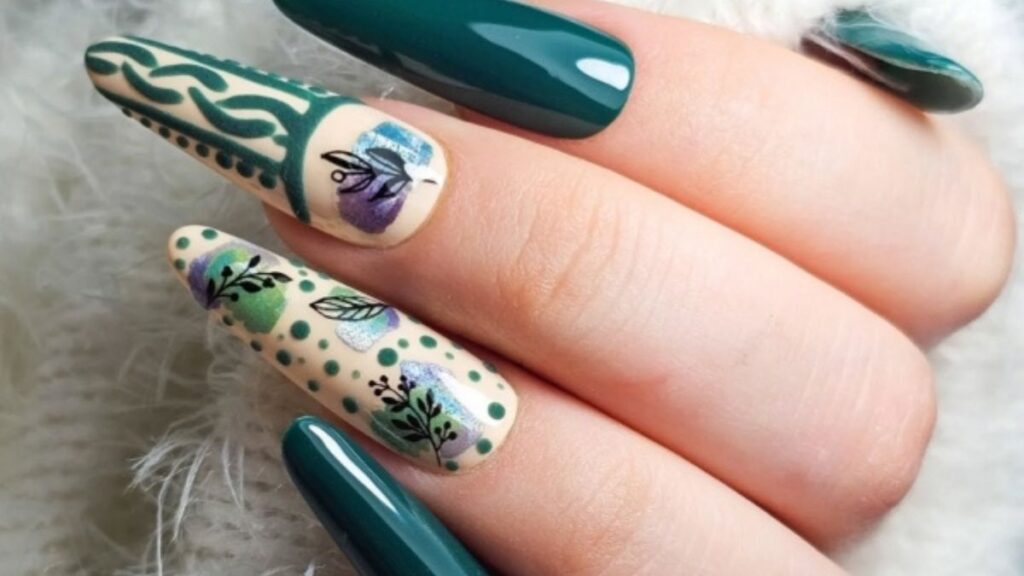
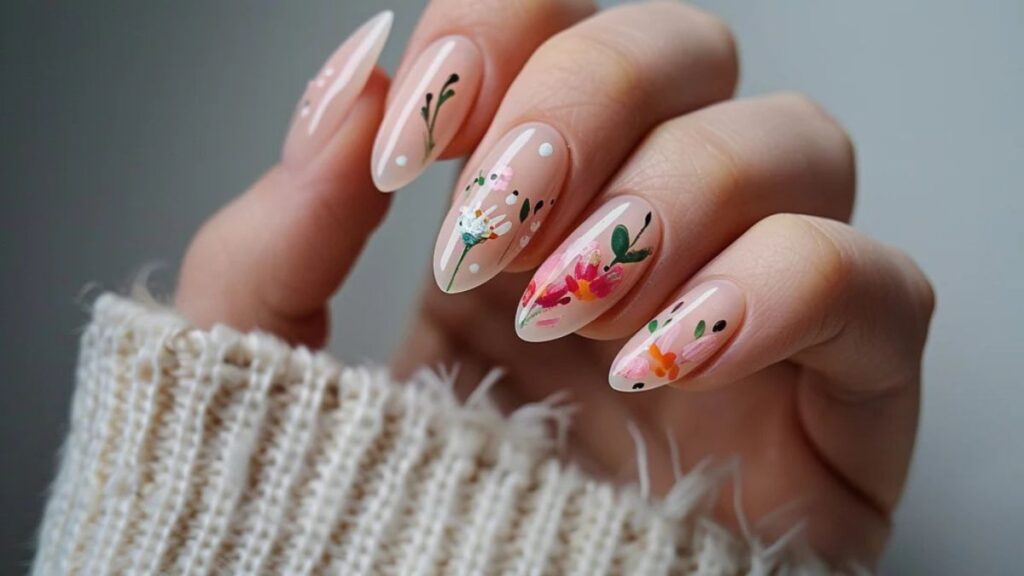
Floral and Botanical Accents
Delicate white flowers on a pink base (or vice versa) are a staple of the cottagecore and romantic aesthetic. Cherry blossoms, daisies, and abstract botanicals are among the most popular. These look intricate but are surprisingly achievable with a thin detail brush and a steady hand.
Marble Effect
Marble nails in pink and white mimic natural stone with veins of grey, gold, or deeper rose running through a white or blush base. This is one of the more complex designs but also one of the most jaw-dropping.
Minimalist Line Art
If you prefer something understated, fine white line art on a pale pink base ticks every box. Geometric lines, abstract loops, or simple dot patterns — all in white on a muted pink — give a modern, artistic look without being overdone.
| Design Style | Skill Level | Best For | Key Technique |
|---|---|---|---|
| Classic French Tips | Beginner | Everyday wear, offices | Edge brush or tape guides |
| Ombre / Gradient | Intermediate | Date nights, weddings | Sponge blending |
| Floral Accents | Intermediate | Spring, special events | Fine detail brush |
| Marble Effect | Advanced | Statement nails | Swirling with a thin brush |
| Minimalist Line Art | Beginner–Intermediate | Casual, editorial looks | Striping tape or liner brush |
Tools and Products You Need
The right tools make the difference between a DIY that looks professional and one that peels off by Tuesday. Here’s what your nail art kit should include:
- Base coat: Protects your natural nail and helps polish adhere longer.
- White gel or regular polish: Opt for a pure, opaque white — no streaking allowed.
- Pink shades: Have at least two — a sheer blush for bases and a deeper rose for accents.
- Detail brushes: A thin liner brush is essential for flowers and line art.
- Dotting tools: Great for simple dot patterns and flower centres.
- Nail stamping plates: Speed up repetitive patterns like florals or geometric designs.
- Makeup sponge: The secret weapon for seamless ombre gradients.
- Gel top coat and UV lamp: If you’re working with gel polish for a long-lasting finish.
- Nail tape / striping tape: Keeps edges clean for French tips and geometric designs.
| Tool | Purpose | Estimated Cost |
|---|---|---|
| Thin detail brush | Fine line work, florals, lettering | £3–£8 |
| Makeup sponge | Ombre blending | £1–£4 |
| Stamping plate + scraper | Repeatable patterns | £5–£15 |
| UV/LED lamp | Curing gel polish | £15–£40 |
| Striping tape | Clean edge guides | £2–£5 |
Step-by-Step: How to Do White Pink Nail Art at Home
Here’s a beginner-friendly approach to a classic pink and white ombre — one of the most requested styles.
Step 1: Prep Your Nails
Start with clean, dry nails. Remove any old polish, push back cuticles, and file your nails into your preferred shape. Apply a thin base coat and let it dry completely.
Step 2: Apply Your Pink Base
Apply two thin coats of your chosen pink polish. A sheer blush or soft baby pink works best for ombre. Let each coat dry before adding the next.
Step 3: Create the Gradient
Apply a stripe of white polish next to a stripe of pink on a makeup sponge. Dab the sponge lightly onto your nail tips, building up the white gradient gradually. Work fast — the polish needs to be wet to blend. Repeat 2–3 times for depth.
Step 4: Clean Up the Edges
Dip a thin brush in acetone and trace around your nail to clean any stray polish from the skin.
Step 5: Add Detail (Optional)
Use a white detail brush to draw delicate floral shapes, thin lines, or dots on your accent nail. Less is more — even one or two small flowers can elevate the entire look.
Step 6: Seal with Top Coat
Apply a generous top coat over all nails. This seals your design, smooths out any texture from the sponge, and adds that high-gloss finish.
Pros and Cons of White Pink Nail Art
Before committing to this style, it helps to weigh the trade-offs honestly.
Pros:
- Suits virtually every skin tone and nail length
- Timeless — never looks dated or overdone
- Works for both casual and formal occasions
- Easy to adapt (from very simple to highly detailed)
- Photographs beautifully in every lighting
Cons:
- White polish can show chips and wear more visibly than darker shades
- Ombre requires some practice to blend seamlessly
- Intricate floral designs take time and a steady hand
- Light colours may require more coats for full opacity
- Sheer pinks can appear washed out on certain skin tones without the right shade selection
Common Mistakes to Avoid
Even experienced nail artists make these errors. Here’s what to watch out for:
1. Skipping the base coat. Without it, polish stains your nails and lifts sooner. Always start with a base coat — no exceptions.
2. Using too much polish at once. Thick coats take forever to dry and are prone to smudging and bubbling. Thin, even coats are always better.
3. Rushing the drying time. Between coats, give each layer at least 2–3 minutes. For ombre, wait until your base is fully dry before sponging.
4. Choosing the wrong white. Stark, blue-toned whites can look harsh. For most skin tones, a warm or slightly cream-toned white sits more naturally.
5. Forgetting to seal the tips. Run your top coat brush across the very edge of each nail. This prevents tip chipping, which is where most manicures start to fail.
6. Overcomplicating the design. Intricate nail art on every finger can look cluttered. Often, a simple design on two or three accent nails and a plain colour on the rest creates the most polished result.
Best Practices for Long-Lasting Results
Getting the design right is only half the battle. Here’s how to make it last:
- Always use a peel-resistant top coat and reapply every two to three days for extra protection.
- Wear gloves when washing dishes or cleaning — water and harsh detergents break down polish quickly.
- Moisturise your cuticles daily with a nourishing oil. Healthy cuticles frame the nail and keep the skin from lifting the polish.
- File gently in one direction only — back-and-forth sawing weakens the nail edge and causes breaks.
- Avoid using your nails as tools. Opening cans, peeling stickers, and similar habits are the fastest way to break both your nail and your design.
| Practice | Why It Matters | Frequency |
|---|---|---|
| Reapply top coat | Seals against chipping and wear | Every 2–3 days |
| Use cuticle oil | Keeps skin healthy, reduces lifting | Daily |
| Wear gloves for chores | Prevents water damage and discolouration | Every time |
| File in one direction | Prevents nail weakening and breaks | As needed |
| Avoid nail-as-tool habits | Prevents breaks and design damage | Always |
Conclusion
White pink nail art is one of those rare styles that genuinely works for everyone. It’s soft enough to be understated, but detailed enough to make a real impression. Whether you opt for a classic French tip, a dreamy ombre, or a hand-painted floral accent nail, this colour combination delivers elegance without effort.
The best part? You don’t need to be a professional to pull it off at home. With the right tools, a little patience, and the guidance above, you’ll have salon-worthy nails that last.
So go ahead — pick your shade of pink, grab that detail brush, and start creating something beautiful.
Frequently Asked Questions
Almost all nail shapes suit pink and white designs. Almond and oval shapes are particularly flattering because they elongate the finger and give ombre gradients room to blend. Square nails work beautifully for French tips and geometric line art.
With regular polish, expect 5–7 days before chipping begins. Gel polish extends this to 2–3 weeks. Reapplying a top coat every few days can significantly prolong both types.
Yes. A simple makeup sponge and two nail polish shades are all you need for a basic ombre. Cut a small piece of sponge, apply both colours side by side, and dab onto the nail. It takes a bit of practice but is very achievable without professional tools.
Fair skin tones suit baby pink, blush, and peach-pink shades. Medium skin tones look great with dusty rose and mauve. Deeper skin tones are complemented beautifully by hot pink, fuchsia, and magenta paired with a warm white or cream.
Absolutely. In fact, simple designs like micro-French tips and minimalist line art often look better on shorter nails. Avoid overly complex or large floral designs on very short nails, as the pattern can overwhelm the nail bed.
/ You May Also Read /
Pro Nails Products: The Complete Guide to Building a Flawless Nail Kit in 2026
Professional Nails: The Ultimate Guide to Salon-Worthy Manicures That Last