Choosing the right acrylic nail kit set professional doesn’t have to feel overwhelming. Start by prioritizing brush quality, a good EMA-based monomer, and a reliable powder. Whether you’re doing nails for yourself or building a client base at home, the right kit will make your work easier, cleaner, and far more satisfying.
Take your time with the learning curve — every nail tech, professional or not, started exactly where you are. With the right tools and a bit of practice, you’ll be sculpting salon-quality nails from the comfort of your own space. And once you’ve nailed the basics, there’s so much more to explore — from gel polish techniques to complete pro nails care routines that take your skills to the next level.
What Is a Professional Acrylic Nail Kit Set?
A professional acrylic nail kit set is a complete collection of tools and products designed to apply, sculpt, and finish acrylic nail extensions. Unlike basic starter kits, professional sets include higher-quality materials built for durability and a cleaner finish.
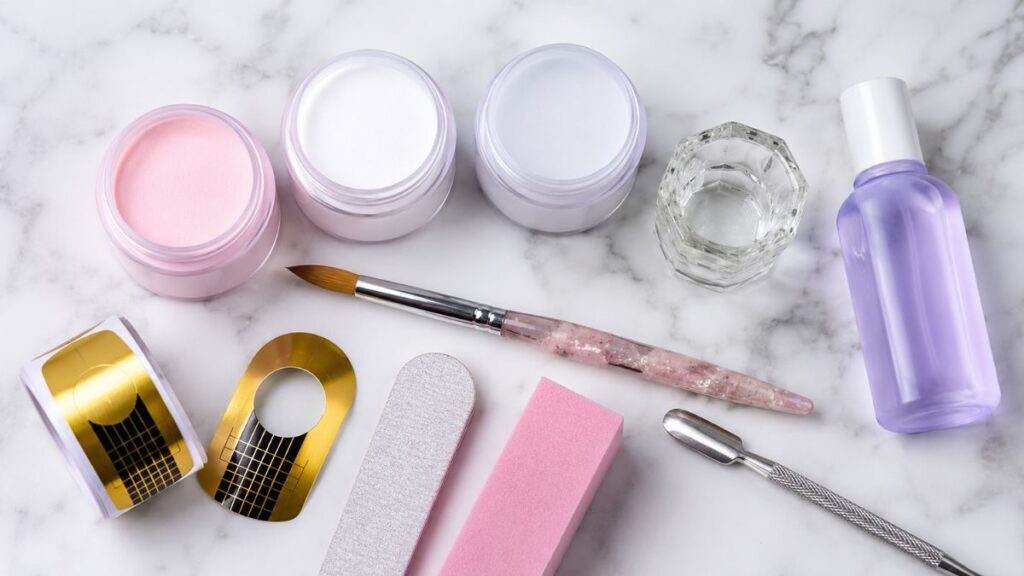
A standard professional acrylic nail kit typically includes:
- Acrylic nail powder (often in pink, white, and clear/nude shades)
- Liquid monomer (ethyl methacrylate or EMA-based)
- Kolinsky or synthetic acrylic nail brush
- Nail forms or full-cover nail tips
- Glass dappen dish
- Nail primer and dehydrator
- Nail file (100/180 grit)
- Buffer block
- Cuticle pusher and nippers
- Nail glue
The difference between a beginner kit and a salon-grade setup usually comes down to the brush quality, the monomer formula, and the powder’s self-leveling capability.
How to Choose the Right Acrylic Nail Kit
Brush Quality Makes or Breaks Your Work
This is the one thing most beginners overlook. A kolinsky sable brush holds product better, releases it more evenly, and lasts longer than nylon alternatives. When shopping, look for a brush labeled “kolinsky” or “natural hair” in a size 8 to 10 — that’s the sweet spot for both beginners and experienced users.
Powder and Monomer Compatibility
Not all acrylics are created equal. Low-quality powders can yellow over time or lift after just a few days. A good professional powder will be self-leveling (meaning it smooths itself out slightly as it sets) and available in multiple shades.
Always use the monomer that’s recommended for your powder brand. Mixing brands can alter the cure time and create weak, brittle nails.
Nail Forms vs. Nail Tips
| Feature | Nail Forms | Nail Tips |
|---|---|---|
| Finish | More natural curve | More uniform shape |
| Skill Level | Intermediate–Advanced | Beginner–Intermediate |
| Time Required | Faster with practice | Slightly longer to prep |
| Best For | Sculpted/custom shapes | Standard extensions |
| Cost | Lower (reusable paper) | Slightly higher |
Both methods work well — forms give you more control over the shape, while tips are more forgiving for beginners.
Breaking Down the Best Components in a Professional Kit
The Monomer: EMA vs. MMA
This is where safety really matters. Always choose EMA (ethyl methacrylate) over MMA (methyl methacrylate). Here’s why:
| Property | EMA (Recommended) | MMA (Avoid) |
|---|---|---|
| Safety | Industry-approved | Banned in several states |
| Odor | Mild | Very strong |
| Flexibility | Good flexibility | Rigid and brittle |
| Removal | Acetone-soluble | Very difficult to remove |
| Nail Damage | Low | High risk |
MMA is cheaper, which is why some low-cost kits still use it. If the ingredient list isn’t disclosed, skip it.
The Brush: Size, Shape, and Hair Type
- Size 8: Great for beginners — smaller bead control
- Size 10: The most popular all-rounder for sculpting and fills
- Size 12+: For experienced techs working quickly on nail extensions
Flat brushes are for art. Round or oval brushes are for sculpting. Don’t mix them up.
Primers and Dehydrators
These two steps are often skipped — and they’re the main reason lifing happens. A dehydrator removes oils and moisture from the nail plate. A primer etches slightly into the surface so the acrylic bonds properly.
Use both, in that order, before applying any product.
Comparing Beginner vs. Professional Acrylic Nail Kits
| Feature | Beginner Kit | Professional Salon Kit |
|---|---|---|
| Brush Type | Nylon/synthetic | Kolinsky sable |
| Powder Quality | Basic, may yellow | Self-leveling, color-true |
| Monomer Type | Often unspecified | EMA-based, branded |
| Included Tools | Basic files, tips | Full tool set + forms |
| Price Range | $20–$50 | $60–$200+ |
| Best For | Learning the basics | Salon work or home studio |
| Longevity | 2–3 weeks (with luck) | 4–6 weeks with proper care |
If you’re serious about nails — even as a hobby — investing in a mid-range professional kit from the start will save you money and frustration in the long run.
Pros and Cons of Using a Professional Acrylic Nail Kit
Pros
- Longer-lasting results — proper kits hold for 3–6 weeks with fills
- Better finish — smoother surface, less buffing required
- More versatile — sculpt any shape or length you want
- Cost-effective long term — at-home kits pay for themselves quickly vs. salon visits
- Creative freedom — mix powders, try ombré, add nail art
Cons
- Learning curve — working with liquid and powder takes practice
- Ventilation required — monomer fumes need a well-ventilated workspace
- Time commitment — a full set can take 1.5–3 hours for beginners
- Product storage — monomers and powders need proper sealing
- Initial cost — quality kits aren’t cheap upfront
Common Mistakes to Avoid
Even experienced users fall into these traps. Here’s what to watch for:
1. Using too much monomer A wet bead lifts and spreads unevenly. Aim for a medium-dry bead — it should hold its shape when you pick it up.
2. Skipping the dehydrator Oils on the nail plate are the #1 cause of lifting. Always dehydrate before priming.
3. Applying too thick near the cuticle Keep the product thin at the base. Bulk in the wrong area creates a heavy, unnatural look and increases the chance of lifting.
4. Filing too aggressively Over-filing thins the natural nail. Use a 100/180 grit file for shaping and a finer grit for surface buffing.
5. Rushing the curing process Acrylic sets on its own — don’t rush it. Give each bead time to firm up before adding more product.
6. Using a dirty brush Never let monomer dry in your brush. Clean it by dipping it in monomer and wiping it on a lint-free wipe after every use.
Best Practices for Long-Lasting Acrylic Nails
Follow these tips and your sets will look fresh for weeks:
- Prep thoroughly — clean, file, dehydrate, and prime before every application
- Work in thin layers — build gradually for strength without bulk
- Cap the free edge — always seal the tip with a thin layer to prevent chipping
- Schedule fills every 2–3 weeks — don’t wait until the gap gets too large
- Moisturize your cuticles daily — healthy skin around the nail extends the life of your set
- Wear gloves for harsh tasks — cleaning products can weaken the acrylic bond
- Store products properly — seal your powder jars tightly and keep monomers away from direct sunlight
Conclusion
Choosing the right acrylic nail kit set professional doesn’t have to feel overwhelming. Start by prioritizing brush quality, a good EMA-based monomer, and a reliable powder. Whether you’re doing nails for yourself or building a client base at home, the right kit will make your work easier, cleaner, and far more satisfying.
Take your time with the learning curve — every nail tech, professional or not, started exactly where you are. With the right tools and a bit of practice, you’ll be sculpting salon-quality nails from the comfort of your own space. And once you’ve nailed the basics, there’s so much more to explore — from gel polish techniques to complete pro nails care routines that take your skills to the next level.
Frequently Asked Questions
A professional acrylic nail kit set should include acrylic powder (in multiple shades), EMA liquid monomer, a kolinsky nail brush (size 8–12), nail forms or tips, a glass dappen dish, primer, dehydrator, nail files in 100/180 grit, a buffer, and cuticle tools.
With a proper professional-grade acrylic nail kit and good prep technique, acrylic nails can last 4–6 weeks. Fills are recommended every 2–3 weeks as the natural nail grows out.
EMA (ethyl methacrylate) is the industry-standard recommended monomer. It’s safer, more flexible, and easier to remove than MMA (methyl methacrylate), which is banned in several U.S. states and can cause nail damage.
Yes. Many professional kits are suitable for beginners, especially those that include instructional guides. Starting with a quality kit rather than a cheap beginner set actually makes learning easier because the products behave more predictably.
Nail forms are paper or foil guides placed under the free edge to sculpt a nail extension directly. Nail tips are pre-shaped plastic extensions glued onto the nail before acrylic is applied. Forms offer more customization; tips are easier for beginners to work with.