Introduction
If you’ve ever watched a nail technician work their magic and wondered how they get nails so perfectly smooth, shaped, and prepped — the answer is almost always a professional nail drill. These powerful little tools are a game-changer, whether you’re a seasoned nail tech or someone who’s decided to take their at-home nail game seriously.
But here’s the thing: not all nail drills are created equal. The wrong one can damage your nails, cause heat spikes, or simply fail to deliver the results you’re after. The right one? It’ll save you hours, improve your finish, and give you that clean, salon-quality look every single time.
In this guide, we’re breaking down everything you need to know — from the different types of drills and bits to how to use them safely and avoid the most common rookie mistakes.
What Is a Professional Nail Drill?
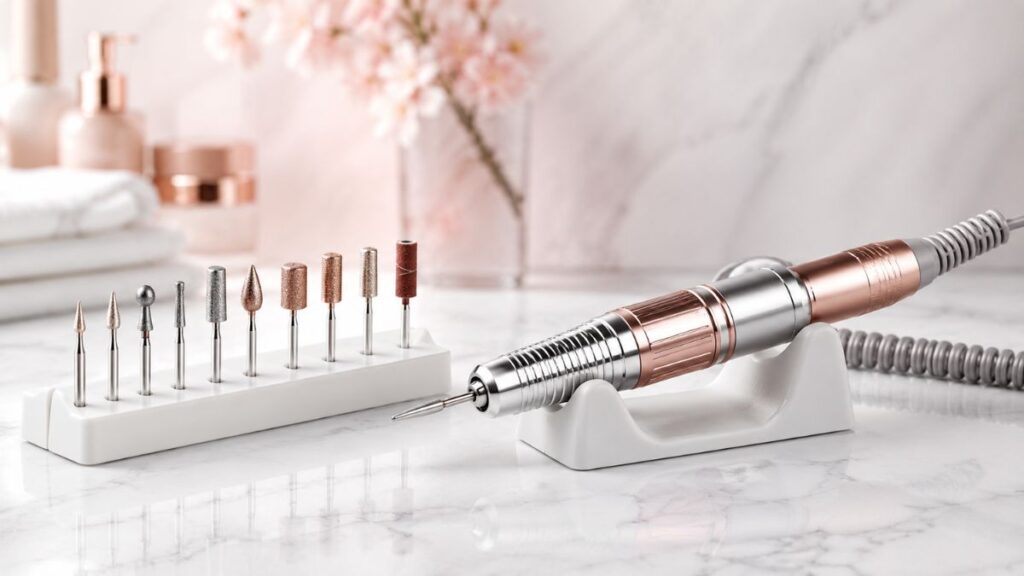
A professional nail drill (also called an electric nail file or e-file) is a motorised device used to shape, buff, smooth, and prep natural or artificial nails. Unlike a standard hand file, an e-file uses rotating drill bits to work faster and with far more precision.
Key components include:
- Handpiece — The main grip you hold, similar to a pen
- Control unit — Sets speed (measured in RPMs) and direction (forward/reverse)
- Drill bits (burrs) — Interchangeable attachments for different tasks
- Foot pedal (optional) — Hands-free speed control used in salons
Professional models typically run between 3,000 and 35,000 RPMs, giving technicians full control from delicate cuticle work to heavy acrylic removal.
How to Choose the Right Professional Nail Drill
Choosing the right e-file comes down to a few key factors. Here’s a quick comparison to help you decide:
| Feature | Beginner/Home Use | Professional Salon Use |
|---|---|---|
| RPM Range | 3,000–20,000 RPM | 20,000–35,000 RPM |
| Motor Type | Carbon brush motor | Brushless motor (quieter, longer life) |
| Torque | Low–Medium | High (handles thick acrylics easily) |
| Noise Level | Moderate | Low (vibration-free) |
| Price Range | £30–£80 | £100–£400+ |
| Best For | Gel removal, shaping | Full nail services, heavy-duty use |
For beginners, a mid-range drill with adjustable speed and a good starter bit set is more than enough. For professional nail technicians, investing in a brushless motor model is worth every penny — they run cooler, last longer, and handle thicker enhancements without breaking a sweat.
Types of Nail Drill Bits Explained
Carbide Bits
Carbide bits are the workhorses of the nail world. They’re incredibly durable and ideal for removing gel, acrylic, or hard gel extensions. You’ll find them in different cut styles — fine, medium, coarse, and extra coarse — depending on the job.
Ceramic Bits
Ceramic bits run cooler than carbide, which makes them a top pick for sensitive clients or for working near the natural nail. They’re great for backfill work, blending product, and surface refinement.
Diamond Bits
Diamond bits are perfect for precision work — cuticle cleanup, sidewall refinement, and smoothing natural nails. They’re gentler but highly effective for detailed finishing.
Mandrel and Sanding Bands
These are used with disposable sanding bands, making them hygienic for use across multiple clients. They’re especially handy for shaping the free edge and smoothing the surface of extensions.
| Bit Type | Best Use | Grit/Strength | Heat Generation |
|---|---|---|---|
| Carbide | Acrylic/gel removal | Fine to extra coarse | Moderate–High |
| Ceramic | Sensitive skin, backfill | Fine to medium | Low |
| Diamond | Cuticles, natural nails | Fine | Very Low |
| Sanding Band | Shaping, surface smoothing | Variable | Low |
How to Use a Professional Nail Drill Safely
Getting Started
Before you switch anything on, make sure your bit is securely fitted into the chuck. A loose bit can cause injury and will produce an uneven finish. Start with your speed set low — even if you’re comfortable using an e-file, rushing in at full speed is a recipe for over-filing.
The Correct Technique
Always keep the drill moving. Holding it in one spot, even for a second, generates heat and can cause a burn — especially over thin natural nails. Use light, sweeping strokes and let the bit do the work.
- Keep the handpiece at a 45-degree angle to the nail surface
- Work in the forward direction for most tasks (reverse is mainly for left-handed grip adjustments)
- Never press hard — the weight of the handpiece itself is usually enough pressure
- Take regular breaks to check your progress and let the nail cool
Speed Guide for Different Tasks
| Task | Recommended RPM |
|---|---|
| Natural nail prep / buffing | 5,000–10,000 RPM |
| Gel top coat removal | 10,000–18,000 RPM |
| Hard gel / builder gel filing | 15,000–25,000 RPM |
| Acrylic removal / backfill | 20,000–30,000 RPM |
| Cuticle work (diamond bit) | 3,000–8,000 RPM |
Pros and Cons of Using a Professional Nail Drill
Pros
- Speed — Removes gel and acrylic significantly faster than manual filing
- Precision — Allows for intricate cuticle and sidewall work that hand files can’t match
- Consistency — Produces an even surface every time, with practice
- Versatility — One handpiece handles dozens of different tasks with bit changes
- Professional results — Nails look salon-finished rather than home-done
Cons
- Learning curve — Incorrect technique can thin or damage the natural nail
- Heat risk — Running at too high a speed or applying too much pressure causes burning
- Cost — Quality professional units require a decent investment upfront
- Maintenance — Bits need regular cleaning and eventual replacement
- Not for everyone — Clients with very thin or damaged nails may need manual filing instead
Common Mistakes to Avoid
Even experienced nail techs can slip into bad habits. Here are the most common mistakes — and how to avoid them:
1. Using the wrong speed for the task Running at full speed for everything is one of the biggest errors beginners make. Delicate cuticle work at 25,000 RPM will absolutely cause damage. Always match your RPM to the task.
2. Applying too much pressure The drill does the work — your job is to guide it. Pressing down hard doesn’t speed things up; it just generates heat and risks filing through to the natural nail.
3. Not cleaning bits regularly Clogged bits drag rather than cut cleanly, which increases friction and heat. Clean carbide and ceramic bits with a dedicated bit brush after every client. Diamond bits can be rinsed under warm water.
4. Skipping the patch test on new clients Some people have extremely thin or sensitive nails. Always start slowly with a new client and check their comfort level before moving to higher speeds.
5. Filing in one direction only While this matters less with a drill than with a hand file, working in varied directions helps avoid uneven thinning, especially on natural nails.
6. Neglecting the handpiece The handpiece itself needs care — lubricate it regularly (most manufacturers recommend a drop of handpiece oil into the chuck) and store it safely to avoid dropping and damaging the internal motor.
Best Practices for Long-Term Nail Health
Whether you’re using a nail drill on yourself or on clients, protecting the natural nail should always be the priority. Here’s what the professionals do:
- Always leave a thin layer of product when filing off gel or acrylic — never file directly onto the natural nail plate
- Invest in a quality dust extractor to protect both you and your clients from nail dust
- Sterilise metal bits between clients using an autoclave or UV steriliser
- Replace sanding bands after every client — they’re disposable for a reason
- Keep your skills sharp — take refresher courses as new nail products and techniques emerge
- Store bits in a proper bit stand or case to keep edges sharp and prevent damage
Conclusion
A professional nail drill is one of the most powerful tools in any nail technician’s kit — and a brilliant investment for anyone serious about achieving high-quality results at home. Once you understand the different bit types, nail your technique, and learn the right speeds for each task, you’ll wonder how you ever managed without one.
The key takeaway? Start slow, choose quality over price where you can, and always prioritise nail health over speed. Whether you’re removing gel, sculpting acrylics, or cleaning up cuticles, the right e-file in confident hands produces results that no manual file ever could.
Take the time to practise, keep your equipment clean, and never rush the process. Your nails — and your clients’ nails — will thank you for it. And if you’re looking to build a complete professional nail routine beyond just the drill, our pro nails complete guide covers everything from nail care basics to advanced nail art techniques — all in one place.
Frequently Asked Questions
The ideal RPM depends on the task. For natural nail prep and buffing, 5,000–10,000 RPM is sufficient. For removing acrylic or hard gel, you may need 20,000–30,000 RPM. Most professional nail drills offer a range of 3,000–35,000 RPM to cover all nail services.
Yes, if used incorrectly. Applying too much pressure, working at excessive speeds, or holding the bit stationary can thin and damage the natural nail plate. When used with the correct technique and appropriate speed settings, a nail drill is completely safe for natural nails.
Carbide and ceramic bits should be cleaned with a stiff bit brush to remove product buildup after each use. Diamond bits can be rinsed under warm running water. Metal bits used across multiple clients should be sterilised using an autoclave. Never use bleach-based cleaners on metal bits as they cause corrosion.
Carbide and ceramic bits should be cleaned with a stiff bit brush to remove product buildup after each use. Diamond bits can be rinsed under warm running water. Metal bits used across multiple clients should be sterilised using an autoclave. Never use bleach-based cleaners on metal bits as they cause corrosion.
Absolutely, for anyone who regularly wears gel or acrylic nails. An e-file dramatically reduces removal time, produces a smoother finish, and is gentler on nails than aggressive manual filing when used correctly. Look for a mid-range model with adjustable speed and a starter bit set for home use.