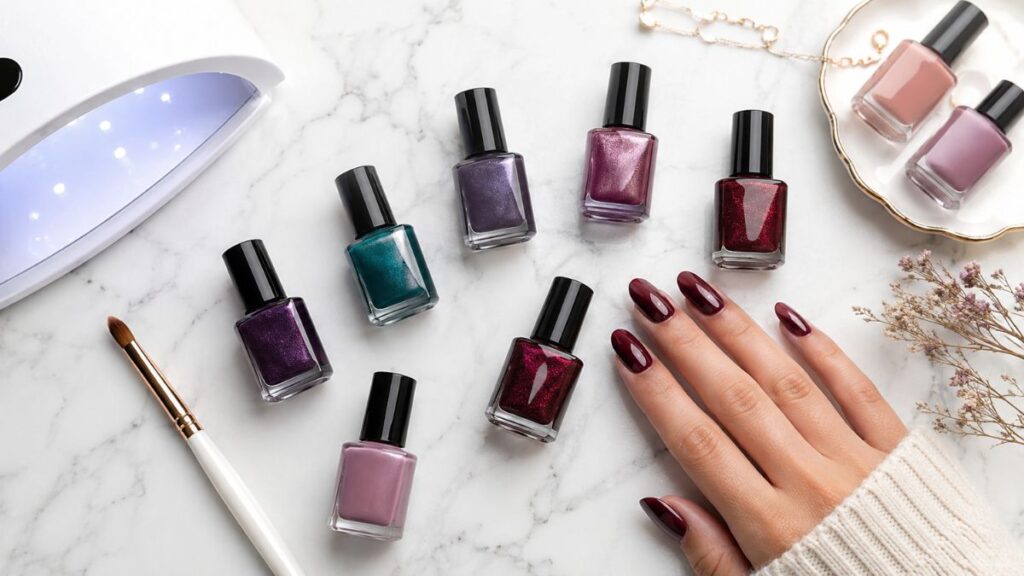
If you’ve ever walked out of a salon with a manicure that still looked perfect two weeks later, chances are you were wearing professional gel nail polish. It’s become one of the most popular nail treatments worldwide — and for good reason. The results are glossy, durable, and genuinely impressive compared to regular polish.
But with so many brands, application techniques, and formulas on the market, knowing where to start can feel overwhelming. Whether you’re a nail technician looking to upgrade your toolkit or someone curious about trying gel nails at home, this guide covers everything you need to know — from how gel polish works to the biggest mistakes you’ll want to avoid.
What Is Professional Gel Nail Polish?
Professional gel nail polish is a specially formulated nail lacquer that cures under a UV or LED lamp to create a hard, chip-resistant finish. Unlike traditional nail polish, which air-dries and can smudge within minutes, gel polish bonds chemically when exposed to light — resulting in a coating that’s significantly tougher and longer-lasting.
The formula typically contains photoinitiators — compounds that react to UV or LED light and trigger the curing process. Once cured, the polish forms a durable, flexible bond that resists everyday wear and tear far better than standard lacquer.
Key Differences: Gel vs. Regular Nail Polish
| Feature | Regular Nail Polish | Professional Gel Polish |
|---|---|---|
| Drying method | Air-dries | Cures under UV/LED lamp |
| Longevity | 3–7 days | 2–4 weeks |
| Chip resistance | Low to moderate | Very high |
| Removal method | Nail polish remover | Acetone soak-off or filing |
| Finish quality | Moderate gloss | High-gloss, mirror-like |
| Application time | 15–20 minutes | 30–45 minutes |
| Professional use | Yes | Standard in salons |
Understanding these differences makes it easier to choose the right product for your lifestyle and skill level.
Why Gel Nail Polish Has Become the Industry Standard
Walk into almost any nail salon today and you’ll find gel polish front and centre. The shift happened gradually over the past decade as formulas improved, lamp technology advanced, and clients started expecting manicures that lasted through busy, hands-on lives.
The appeal is straightforward. A gel manicure looks freshly done for weeks rather than days. The finish is deeply glossy — almost three-dimensional in quality — and the nails are less prone to breaking during everyday tasks. For clients with brittle or soft natural nails, the structured coating from gel polish can actually provide an element of protection.
From a professional standpoint, gel polish commands higher service prices and encourages repeat appointments every two to three weeks. It’s a win-win for both the technician and the client.
Types of Professional Gel Nail Polish Systems
Not all gel polishes are created equal. There are several distinct systems used professionally:
- Soft gel (soak-off): The most common type. Applied like regular polish and removed by soaking in acetone. Brands like OPI GelColor, Shellac by CND, and Gelish fall into this category.
- Hard gel: Thicker, stronger formula often used for nail extensions. Requires filing rather than soaking to remove.
- Gel-lacquer hybrids: Formulas designed to bridge the gap between polish and gel, offering easier removal with some durability benefits.
- Builder gel in a bottle (BIAB): A newer trend offering nail strengthening alongside colour and gloss.
For most clients seeking a standard long-lasting manicure, soak-off soft gel is the go-to choice.
How to Apply Professional Gel Nail Polish Correctly
Application technique makes an enormous difference in the final result. A flawless gel manicure requires preparation, thin layers, and thorough curing at each stage.
Step-by-Step Application Process
- Prep the nails – Push back cuticles, lightly buff the nail surface, and remove all oils with a dehydrator or 99% isopropyl alcohol.
- Apply a base coat – Cure under LED for 30–60 seconds or UV for 2 minutes.
- Apply thin colour coats – Two thin coats are almost always better than one thick coat. Cure each layer fully.
- Seal with a top coat – Cure completely. Some top coats require wiping away the inhibition layer with a cleanser; others are no-wipe formulas.
- Moisturise – Apply cuticle oil immediately after finishing for a professional result.
Skipping any of these steps is one of the most common reasons gel manicures lift, peel, or fade prematurely.
Choosing the Best Professional Gel Nail Polish Brand
The market is saturated with options, which makes choosing the right brand a real challenge. Price doesn’t always reflect quality, and the best choice often depends on the lamp you’re using and the specific results you’re after.
Top Professional Gel Polish Brands Compared
| Brand | Best For | Lamp Compatibility | Average Wear Time |
|---|---|---|---|
| CND Shellac | Beginners & professionals | CND UV/LED (dual) | 14+ days |
| OPI GelColor | Colour range & salons | LED lamps | 2–3 weeks |
| Gelish | Value for professionals | Harmony LED | 3+ weeks |
| Orly Gel FX | Sensitive nail clients | LED/UV | 2 weeks |
| Valentino Beauty Pure | High-performance salons | LED | 3–4 weeks |
Always check lamp compatibility before purchasing. Using a gel formula under the wrong lamp is one of the most common causes of under-curing and premature lifting.
Pros and Cons of Professional Gel Nail Polish
Like any beauty treatment, gel nails come with genuine advantages and a few drawbacks worth knowing about before you commit.
Pros
- Exceptional longevity — Most gel manicures last two to four weeks without chipping.
- Instant dry time — Once cured, gel nails are completely set. No smudging, no waiting.
- High-gloss finish — The shine from gel polish is noticeably richer than regular lacquer.
- Nail protection — The cured coating adds a layer of strength to natural nails.
- Wide colour range — Professional brands offer hundreds of shades, including glitters, chromes, and neons.
Cons
- Removal requires care — Improper acetone removal or peeling can damage the natural nail plate.
- Higher cost — Gel manicures are typically more expensive than standard polish services.
- Requires UV/LED equipment — You need the right lamp at home for proper curing.
- Potential nail sensitivity — Repeated exposure to gel without breaks can thin the nail plate over time.
- Not ideal for very weak nails — Some very damaged nails may not respond well without a nail strengthening treatment first.
Common Mistakes to Avoid with Gel Nail Polish
Even experienced nail technicians occasionally slip into bad habits. Here are the most frequent mistakes — and how to prevent them.
Applying gel too thick. Thick layers don’t cure evenly. Always apply in thin, controlled coats and cap the free edge.
Skipping nail prep. Oil and moisture on the nail surface prevent proper adhesion. Never skip the dehydration step.
Under-curing. Using an old or low-wattage lamp can leave gel soft and prone to denting. Check your lamp’s wattage and replace bulbs regularly in UV lamps.
Flooding the cuticles. Getting gel on the skin breaks the seal and creates lifting points. Keep product 1–2mm away from the cuticle line.
Peeling gel off at home. This is the number one way to damage natural nails. Always soak off properly with acetone and foil wraps.
Best Practices for Long-Lasting Gel Nails
Getting the most out of a gel manicure comes down to both professional application and aftercare.
- Apply cuticle oil twice daily to keep the surrounding skin hydrated and maintain the nail’s flexibility.
- Wear gloves when cleaning or doing dishes — harsh chemicals and prolonged water exposure can cause lifting.
- Book infills or removal appointments every two to three weeks rather than letting gel grow out excessively.
- Give nails a rest between gel applications every few months to allow the natural nail to breathe and recover.
- Use a nail strengthener during breaks between gel services.
Gel Nail Polish Aftercare: Quick Reference
| Timeframe | Action |
|---|---|
| Immediately after | Apply cuticle oil generously |
| Daily | Moisturise hands and apply cuticle oil |
| Week 1–2 | Avoid prolonged water exposure; wear gloves |
| Week 2–3 | Book maintenance or removal appointment |
| Every 3–4 months | Take a break from gel; use strengthening treatment |
Conclusion
Professional gel nail polish has genuinely changed the nail industry. The combination of long wear, flawless finish, and sheer variety of colours makes it an outstanding choice for anyone who wants a manicure that keeps up with real life. The key is understanding the system — choosing a quality brand, using the right lamp, mastering thin application, and following proper aftercare.
Whether you’re a professional building your salon menu or someone exploring at-home gel kits, the investment in technique and good product pays dividends in results every time. Start with a trusted soak-off system, prioritise prep, and your gel manicures will look salon-perfect from start to finish. For everything else you need to know — from nail art ideas to complete care routines — explore our pro nails complete guide and take your nail game to the next level.
Frequently Asked Questions
With proper application and aftercare, professional gel nail polish typically lasts two to four weeks without chipping or significant fading. Longevity depends on nail preparation, the quality of the formula used, and how well you care for your nails afterward.
Yes, it’s possible to apply gel polish at home with the right tools — specifically a quality UV or LED lamp, a reputable gel system, and a good understanding of the application steps. However, results are generally better when applied by a trained nail technician, particularly around the cuticle area.
UV lamps cure most gel formulas but take longer (around 2 minutes per coat) and require bulb replacements. LED lamps cure faster (30–60 seconds), last longer, and are more energy-efficient — but they only work with LED-compatible gel formulas. Always check your gel brand’s lamp recommendations.
When applied and removed correctly, gel polish does not significantly damage natural nails. The main risks come from improper removal — particularly peeling or picking gel off — which can strip layers from the nail plate. Taking regular breaks between gel applications also helps maintain nail health.
The safest removal method is the acetone soak-off technique. Soak a cotton pad in 100% acetone, place it on the nail, wrap tightly with foil, and leave for 10–15 minutes. The gel should soften and gently lift away without scraping or forcing. Never peel gel off the nail.